Contact Detail Report
To access Insights, go to https://insights.carexm.com
You will use the same login information that you use to access CXM to log into Insights. This means that if you change your CXM password, it will update in Insights as well.
Your CXM user must have the Analytics toggle turned ON in order to log into Insights.
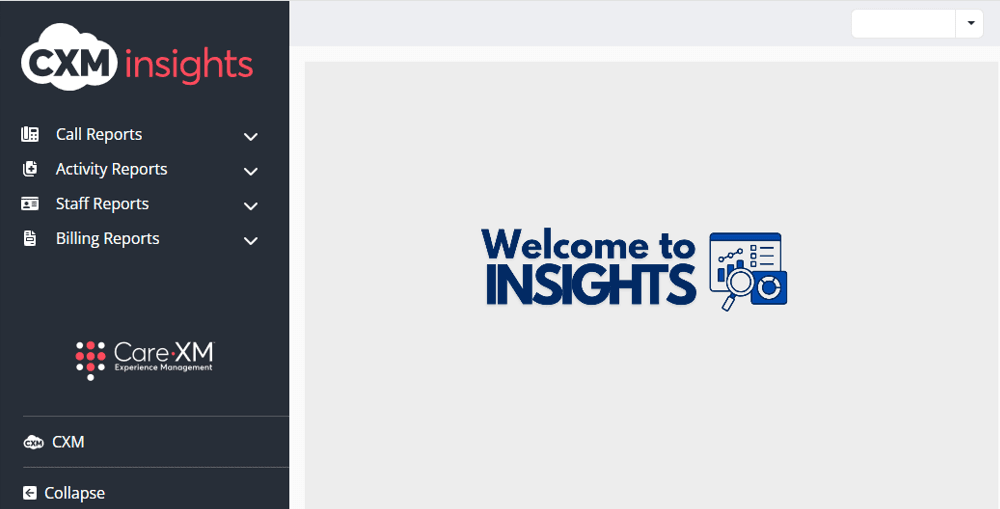
Once logged in, you will be on the landing page and can choose from the different reports by hovering over the category in the left side bar:
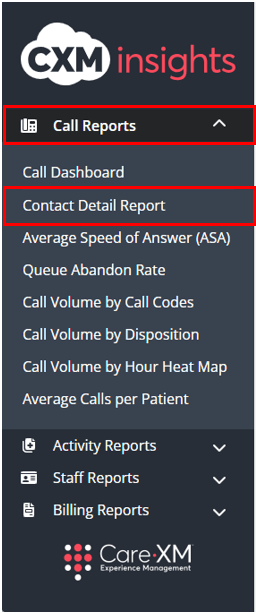
Click on Call Reports, then "Contact Detail Report"
The Contact Detail Report details all of the specifics of every call, both inbound and outbound, including the system, staff who took the call, time the call came in, menu duration, how long the call was in queue, talk time, transfer time, disposition, whether the call was billable and the contact ID.
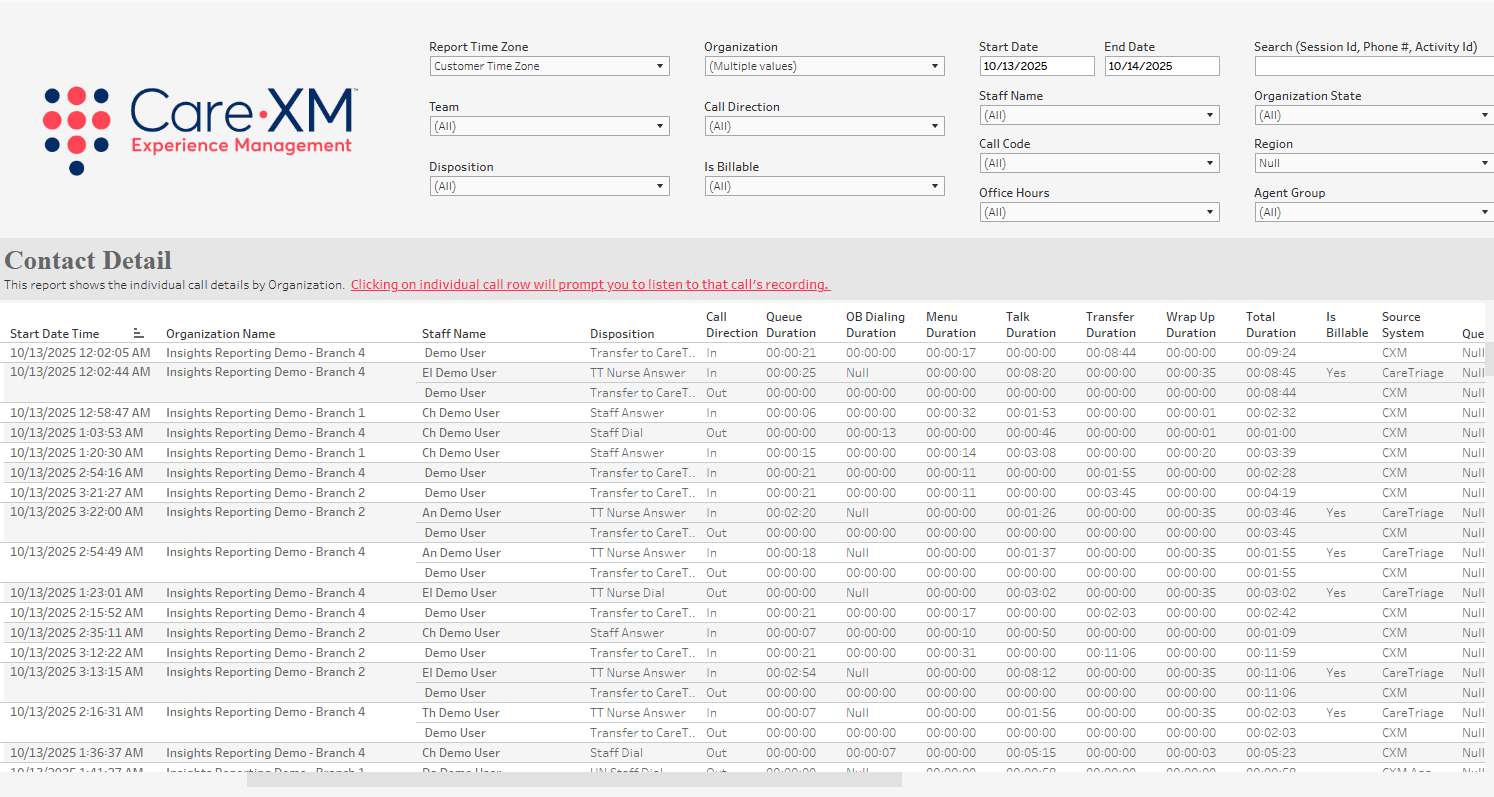

Use the scroll bar at the bottom of the screen to view the Contact ID, Start Date Time, Staff Name and State of the call. To open the activity, simply click on the Activity URL, right click to copy and paste onto your browser. The Queue Display Name will show the name of the queue the call ultimately went to, which can be different than the organization's name. This is only for Enterprise client call centers. Non-Enterprise client users will show "Null" under the Queue Display Name.
The report can be filtered by Time Zone, Organization, Date Range, Search (Session ID, Dialed or Caller Number), Team, Call Direction, Staff Name, Organization State, Disposition, Is Billable, Call Code, Region, Office Hours, and Agent Group.

- Report Time Zone: The report will process the data in the user's time zone, to switch time zones, click on the drop down and choose the correct option.
- Organization: This filter allows the user to select the organization(s) for which they want to see data. Only Organization(s) that the user has access to AND that have data in the selected time frame will be shown in the filter options.
- Date Range: The default date range chooses today minus 10 days. To look up a specific date range, manually enter the date.
- Search: Enter the Session ID, Dialed, or Called Number to find a specific call.
- Team: This filter allows the user to see only what was created by a specific team. For example, if filtered down to CareTriage, the report would only show data for calls handled by CareTriage.
- CareAssist - Calls taken by CareXM Non-Clinical team (Patient Care Advocates).
- CareTriage - Calls taken by CareXM Clinical team (Registered Nurses).
- CXM App - Calls taken in the Legacy CXM App (Total Triage).
- CXM - Calls taken by Enterprise client users.
- Call Direction: Choose whether the call in an inbound or outbound call.
- Staff Name: Name of staff member who took call.
- Organization State: This filter allows users to filter the list of Organizations down to those located in the selected geographical state(s). By default, all Organization States will be selected.
- Disposition: The report can filter by disposition, which displays what happened with the call.
- Is Billable: Optional filter. Calls under 25 seconds are not billable calls.
- Call Code: Primary reason for call.
- Region: This filter allows users to filter large organizations by the Regions set on the Organization page, and quickly filters to a group of Organizations in a specific geographical area.
- Office Hours: This filter allows users to filter the data to show Calls or Activities that occurred only during Office Hours or After Hours.
- Agent Group: This filter allows users to filter call reports down to call volume handled by different groups of agents within the call center. (Enterprise clients only)
Note: For report to filter correctly, click on the "Apply" button on the bottom of each filter's drop down. Only applies if the list exceeds 10 options.
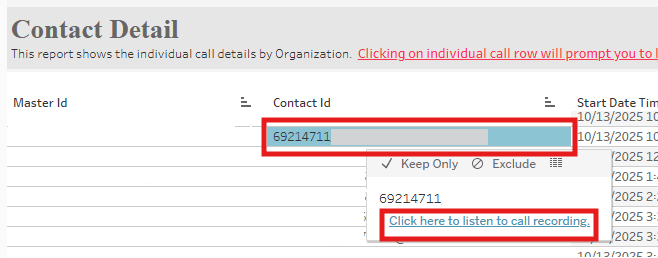
To listen to the call, hover anywhere on the line for the call and with your mouse click where it says "Click here to listen to call recording":
A pop-up box will display, enter the phone number the call should be sent to. Do not enter a phone number with an extension. The call will be routed to the phone number entered and will ring from the phone number (801) 555-1212. Upon answering the call, the system will ask for the PIN. Enter the 4 digit PIN displayed on your screen:
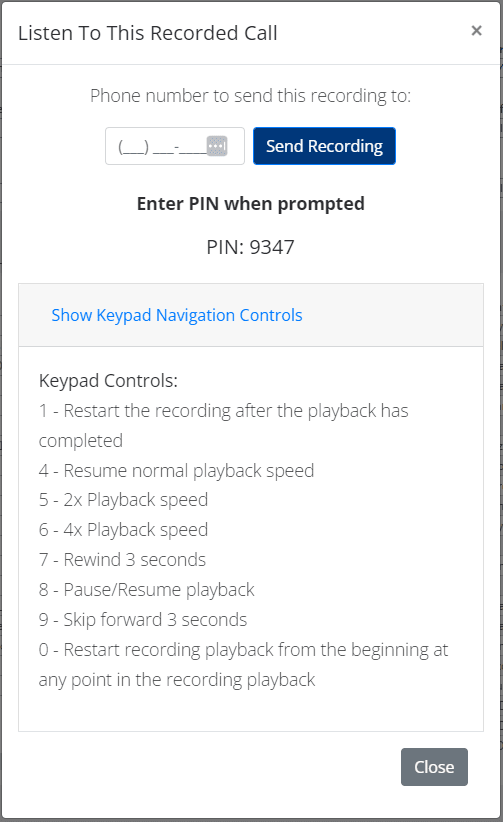
There is an option to expand and see the Keypad call recording control options. All you have to do is click on "Show Keypad Navigation Controls".
The call recording will automatically being playing from the beginning and will include any queue time. The call can also be downloaded.
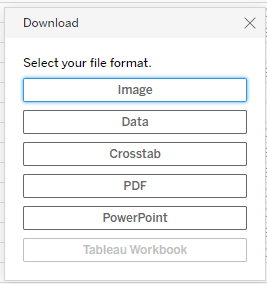
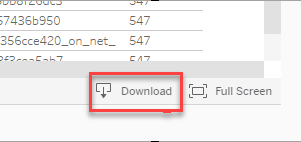
The information displayed on the contact detail report can be downloaded or printed by using the "Download" option in the lower right corner of the screen:
Choose your file format: